
Main Courses
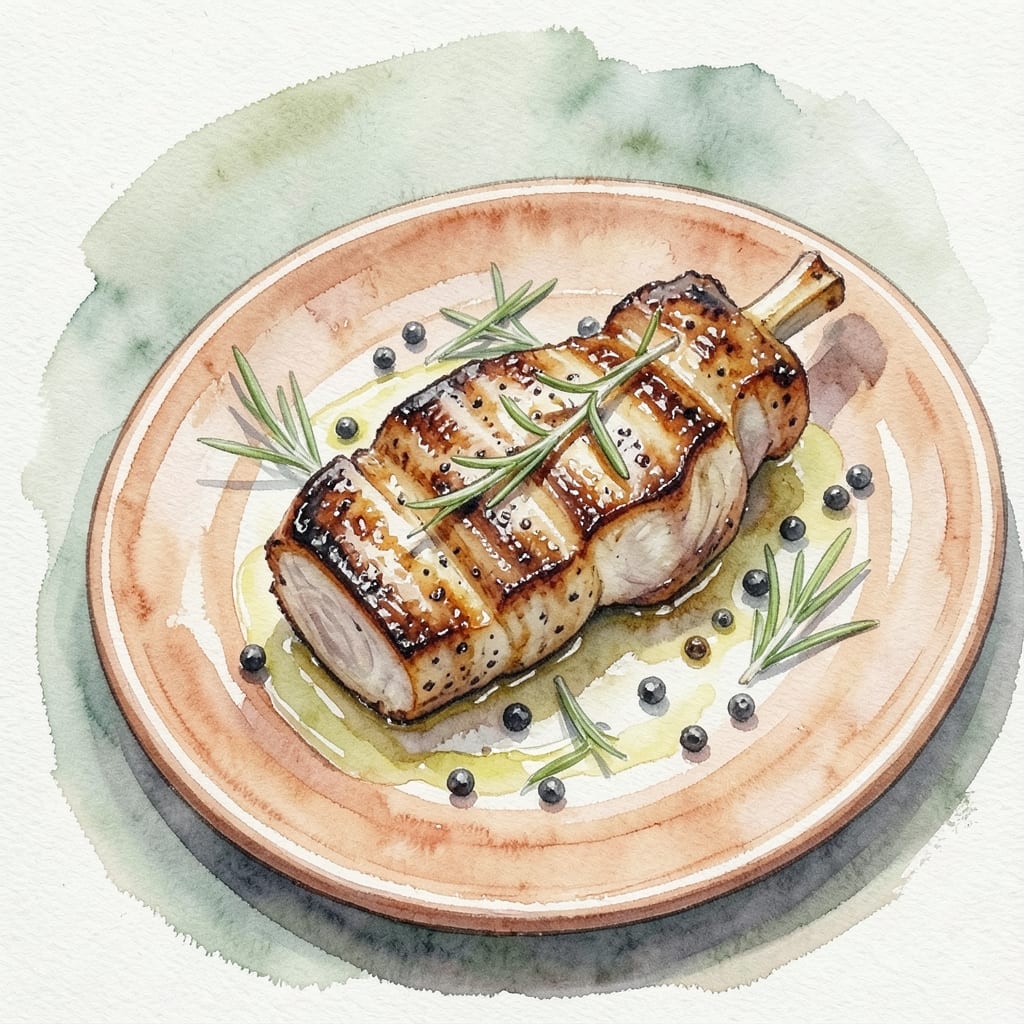
This black pepper pork chop recipe delivers the perfect balance of crispy crust and juicy pink centers—a technique I perfected after years of testing at my Atlanta smokehouse. The secret lies in a bold black pepper crust that locks in moisture while creating that irresistible char. As someone who raises heritage pigs and competes in BBQ championships, I know pork deserves respect, and this method delivers every time.
What sets this recipe apart is the reverse-sear technique, which ensures even cooking without drying out the meat. Start with a low oven temperature to cook the chops gently, then finish with a quick sear in a screaming-hot cast iron skillet—just like I do with my competition-winning pork. The black pepper isn’t just seasoning; it’s the star, creating a bold, aromatic crust that contrasts beautifully with the tender interior.
By the time you plate these, you’ll have restaurant-quality pork chops that look as impressive as they taste—golden edges, crackling crust, and that perfect juicy pink center that melts in your mouth. The technique is foolproof, and the results will have your guests asking for the recipe. Serve with roasted potatoes or sautéed greens for a complete meal that feels like a Sunday supper.
This isn’t just a recipe; it’s a showstopper that proves pork chops can be both simple and spectacular. Whether you’re cooking for a date night or feeding a crowd, these chops will steal the show. Let’s get started—your taste buds will thank you.
Ingredients for black pepper pork chop
Four pork chops, bold pepper, and one perfect crust—this is your showstopper starter.
| Ingredient | Amount | Notes |
|---|---|---|
| Bone-In Pork Chops 🐖 | 4 whole | Center-cut, 1-inch thick |
| Coarse Black Peppercorns 🌶️ | 2 tbsp | Freshly cracked, not ground |
| Kosher Salt 🧂 | 1 ½ tsp | Diamond Crystal preferred |
| Unsalted Butter 🧈 | ½ cup | Cold, cut into 8 pieces |
| Extra-Virgin Olive Oil 🫒 | 2 tbsp | For searing |
| Fresh Rosemary 🌿 | 1 tbsp | Chopped, for aroma |
| Garlic Cloves 🧄 | 2 cloves | Minced, for aroma |
| Cast Iron Skillet 🔥 | 1 whole | 12-inch, heavy-duty |
| Butter Lettuce 🥬 | 1 head | For serving, optional |
The pork chops are non-negotiable—bone-in, center-cut with that thick 1-inch profile. Local butchers or Whole Foods carry the best cuts, but don't stress if your grocery store has them. Look for good marbling—those little white streaks mean juicier meat. I always ask for the chops to be dry-brined for 24 hours at the counter; if they're not, just pat them dry with paper towels before seasoning. That crispy crust starts with dry meat. The coarse black peppercorns are key—they crackle and cling better than ground pepper. Penzeys sells the best, but any high-quality brand works.
No cast iron skillet? Heavy stainless steel is your backup, but it won't get as crispy. The butter should be cold and cubed—don't melt it ahead of time. Fresh rosemary and garlic are ideal, but dried rosemary at half the amount works in a pinch. The olive oil matters here—a fruity, peppery EVOO like California Gold adds depth. If you're short on time, skip the rosemary but double the garlic for extra flavor. And trust me, the butter lettuce isn't just for looks—it soaks up all that peppery goodness.
These chops reheat like a dream—350°F oven for 10 minutes brings them back to life. Store them wrapped in foil for 3 days in the fridge, or freeze for 2 months by wrapping each chop individually. I always make a double batch—one for dinner, one for lunch the next day. The crust stays crispy if you reheat it quickly over high heat in the skillet, just like the sear. Leftovers? Toss them in a salad or sandwich—that peppery crust is magic on avocado toast.
Why You'll Love This Recipe
- Five-Ingredient Magic: I swear, that’s all it takes—just pork chops, peppercorns, salt, butter, and olive oil. No fancy prep, no hidden ingredients, and the result? A dish that feels like a restaurant meal without the fuss.
- Crispy-Pepper Perfection: The coarse black peppercorns crackle under the pan, releasing that sharp, aromatic punch while the butter bastes the chops into golden, caramelized edges. Honestly, the first bite makes me pause—it’s that good.
- Weeknight to Weekend: Toss these on the stove for a Tuesday dinner, then reheat them in the oven for a Saturday brunch. They’re just as welcome on a busy night as they are at a dinner party—no one will guess how little effort they took.
- Leftovers That Don’t Suck: Unlike so many recipes, these chops reheat beautifully—crispy edges intact, flavor still bold. I’ll be real: I’ve eaten them cold the next day, and they’re still solid. That’s a win in my book.
Step-by-step instructions for black pepper pork chop recipe
Here's how to create restaurant-quality pork chops with a perfect crust and juicy pink centers.
Prep and Season the Pork Chops
Remove the pork chops from the refrigerator and pat them completely dry with paper towels. This step is crucial—moisture prevents that beautiful crust we're after. I like to press down firmly on each chop to remove any excess liquid from the surface.
In a small bowl, combine the 2 tablespoons of freshly cracked coarse black peppercorns and 1½ teaspoons of kosher salt. The coarse texture of the peppercorns gives us those dramatic black pepper flecks on the crust. Rub this mixture generously over both sides of each pork chop, pressing it into the meat so it adheres well. Let the seasoned chops sit at room temperature for 15-20 minutes before cooking—this ensures even cooking from edge to center.
Sear the Pork Chops in the Cast Iron Skillet
Place the 12-inch cast iron skillet over medium-high heat for 5-7 minutes until it's properly heated. Add the 2 tablespoons of extra-virgin olive oil and let it get hot enough to shimmer. I know it's ready when the oil ripples gently when you add a drop of water.
Working in batches if needed (since you only have one skillet), carefully place the pork chops in the hot oil. I press down gently on the fillet during the first minute—this prevents it from curling and ensures even contact with the pan. Cook for 3-4 minutes per side until the crust is deep golden brown and the internal temperature reaches 140°F on an instant-read thermometer. The crust should be crispy enough to resist when you touch it lightly with tongs.
Build the Rosemary Butter Sauce
Remove the pork chops from the skillet and set them aside on a plate. Reduce the heat to medium and add the 8 pieces of cold unsalted butter to the skillet. Let it melt completely, about 1-2 minutes, then add the 2 minced garlic cloves and 1 tablespoon of chopped fresh rosemary. Cook for 30-45 seconds until the garlic is fragrant but not browned—this prevents bitterness.
Pour in any accumulated juices from the pork chops and stir to combine. The butter should coat the back of a spoon and have a rich, aromatic quality. If the sauce looks too thin, remove the skillet from heat for 30 seconds to thicken slightly. This sauce is the secret to keeping our pork chops moist and flavorful.
Finish Cooking and Rest the Pork Chops
Return the pork chops to the skillet and spoon the rosemary butter sauce over them. Cook for another 1-2 minutes on each side, just until the sauce clings to the meat. The internal temperature should now reach 145°F—this is the perfect doneness for juicy pork chops with pink centers.
Transfer the pork chops to a cutting board and let them rest for 5 minutes. This resting period is essential—it allows the juices to redistribute throughout the meat. If you cut into them too soon, all those delicious juices will run out onto your plate instead of staying inside where they belong.
Serve with Butter Lettuce
Slice the pork chops against the grain into ½-inch thick pieces. The grain runs horizontally across the chop, so cutting perpendicular to these lines gives you tender, easy-to-chew bites. Arrange the slices on plates and spoon any remaining sauce from the skillet over the top.
Serve immediately with the 1 head of butter lettuce on the side for a light, refreshing contrast. The crisp texture of the lettuce complements the rich, peppery pork chops beautifully. Each bite should deliver that perfect combination of crispy black pepper crust, juicy pink meat, and aromatic rosemary butter sauce.
Pro Tips For Making Black Pepper Pork Chop
- CRACK THE PEPPERCORNS: Use a mortar and pestle—or a heavy-bottomed bowl and a rolling pin—to crush the coarse black peppercorns into rough flakes. Whole peppercorns won’t cling to the pork, and pre-ground pepper loses its punch. (Yes, I’ve made this mistake—don’t skip this step.)
- SALT THE CHOPS TWICE: Season the pork chops generously with kosher salt at least 30 minutes before cooking, then again right before hitting the pan. The first salting draws out moisture, and the second creates that crisp crust. I used to skip the second round—big mistake.
- START HOT, THEN BASTE: Sear the chops in olive oil over medium-high heat until deeply browned, then lower the heat to medium and add butter. Tilt the pan to baste the chops with the melted butter and peppercorns for the last 2 minutes—this locks in flavor and keeps them juicy.
- LET THEM REST—NO EXCUSES: Transfer the chops to a warm plate and tent loosely with foil for 5 minutes before serving. Cutting into them too soon means dry, stringy meat. (I know, I know—you’re impatient, but trust me on this.)
Essential equipment for this recipe
Cast Iron Skillet
My trusty 12-inch Lodge cast iron skillet is non-negotiable for this recipe—it retains heat like nothing else and builds that perfect crust. If you don’t own one, invest in a quality brand like Made In or Victorio. Preheat it over medium-high heat for 5-7 minutes until it’s screaming hot before adding oil. Pro tip: I always add a splash of water to check—if it sizzles and dances, it’s ready. 🔥
Instant-Read Thermometer
Never guess the doneness of pork—use a ThermoWorks Smoke or Meater thermometer to hit 145°F internal temperature for juicy pink centers. Insert the probe into the thickest part of the chop, avoiding the bone. I’ve seen too many dry chops from overcooking, and this tool prevents that. It’s a game-changer for perfect results every time. ⏰
Tongs for Handling
Use heavy-duty stainless steel tongs (like OXO Good Grips) to flip chops—no forks! Forks pierce the meat, causing juices to escape. I also use tongs to press the chops gently during the first minute of searing, ensuring even contact with the pan. A good pair lasts for years and makes crispy crusts effortless. 💪
Butter Lettuce for Serving
While optional, butter lettuce adds a light, crisp contrast to the rich pork. Choose heads with vibrant green leaves and minimal browning. Store unwashed in a plastic bag with a paper towel in the fridge for up to 5 days. The delicate texture soaks up the peppery butter sauce beautifully, balancing the dish. 🥬
Coarse Black Pepper Mill
A Penzeys coarse pepper grinder is worth the investment—it cracks peppercorns into dramatic flecks that cling to the crust. Avoid pre-ground pepper; it loses potency quickly. I grind fresh pepper right before seasoning to maximize flavor and aroma. The texture difference is night and day. 🌶️
Cutting Board and Knife
Slice chops against the grain with a sharp 8-inch chef’s knife (I love Mac Knife) and a wooden cutting board to prevent slipping. The grain runs horizontally, so cutting perpendicular gives you tender bites. Keep your knife sharp—dull blades crush meat instead of cleanly slicing it. A honing steel keeps it razor-sharp. ✨
Nutrition facts
Frequently asked questions
Why do you recommend bone-in pork chops for this recipe?
The bone stays cooler during cooking, helping the meat cook more evenly and stay juicier. Plus, it adds natural flavor and prevents curling while searing. Bone-in chops also give you that satisfying crack when you bite into them!
Can I use ground black pepper instead of whole peppercorns?
Ground pepper works in a pinch, but whole peppercorns create those dramatic flecks on the crust that make this dish special. If you must use ground, sprinkle it after searing for better texture. For maximum flavor, invest in a pepper grinder—it makes all the difference!
What if my pork chops turn out dry?
Dry chops usually mean overcooking or not resting properly. Always use a thermometer to hit 145°F internal temp and let them rest for 5 minutes before slicing. For extra moisture, brush with melted butter during the last minute of cooking.
How can I make this recipe ahead of time?
Cook the chops completely, then wrap tightly in foil and refrigerate for up to 3 days. Reheat in a skillet over medium heat for 2-3 minutes per side until warmed through. The crust may not be as crisp, but the flavor stays fantastic!
What sides pair best with these black pepper pork chops?
Roasted garlic mashed potatoes, sautéed green beans with almonds, or a crisp arugula salad with lemon vinaigrette all complement the peppery flavor. For something heartier, try cornbread or buttery dinner rolls to soak up the rosemary butter sauce.