
Sauces & Condiments
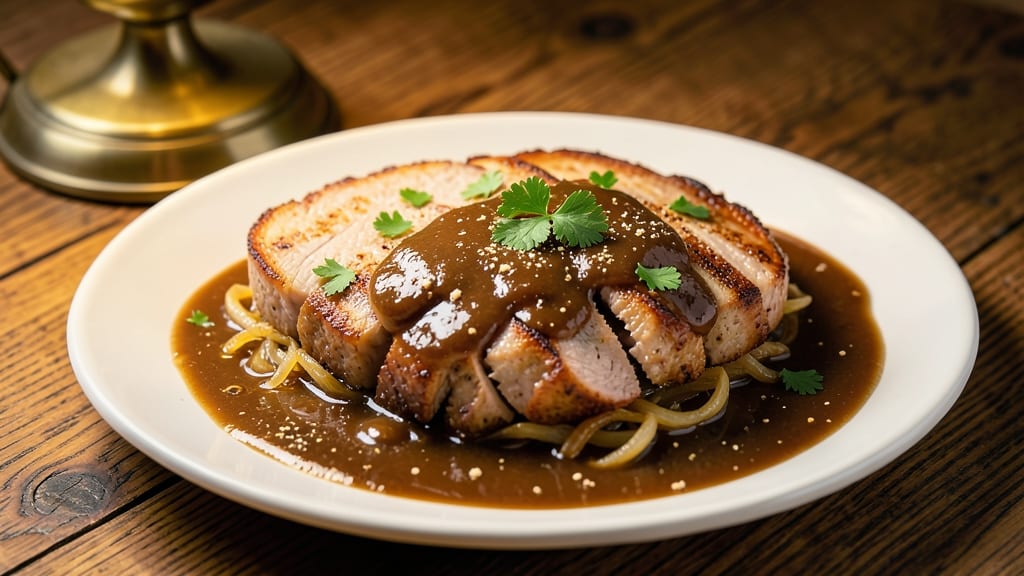
This brown pork gravy recipe transforms simple weeknight dinners into restaurant-worthy meals with just a few key techniques. The secret lies in properly browning pork pieces and capturing those rich, caramelized bits in a velvety sauce.
I developed this method after years of perfecting gravies for my BBQ competitions—it’s the kind of sauce that makes roasted pork taste like it came from a Southern kitchen.
Start by searing pork chops or tenderloin until golden, then deglaze the pan with broth and aromatics like onions and garlic. A simple roux made from butter and flour thickens the sauce just enough to coat everything beautifully.
The result is a deep, savory gravy that clings to mashed potatoes, roasted vegetables, or even pancakes for breakfast. It’s foolproof once you understand the browning step—no lumps, no thin sauce, just pure flavor.
What makes this gravy special is how it elevates any dish without overpowering it. The pork’s natural richness combines with the caramelized fond from the pan, creating layers of umami that turn simple sides into something extraordinary.
I’ve tested this recipe countless times, and it never fails to impress—whether you’re feeding a family or just treating yourself to a cozy meal.
Store leftovers in the fridge for up to 5 days, or freeze for months. The sauce actually improves with time, deepening in flavor as the ingredients meld. Perfect for meal prep or last-minute dinners, this gravy is the ultimate weeknight hero. Let’s get cooking!
Ingredients for brown pork gravy
Pantry staples plus a few key ingredients transform simple pork into velvety, restaurant-quality gravy.
| Ingredient | Amount | Notes |
|---|---|---|
| Pork Chops or Tenderloin 🐖 | 1 ½ lb | Cut into even pieces for browning |
| Unsalted Butter 🧈 | ½ cup | Cold, cubed for roux |
| All-Purpose Flour 🌾 | ½ cup | For smooth roux development |
| Yellow Onion 🧅 | 1 whole | Diced, for aromatic base |
| Garlic Cloves 🧄 | 4 cloves | Minced, for depth of flavor |
| Beef Broth 💧 | 2 cups | Low-sodium preferred |
| Dry White Wine 🍷 | ½ cup | Substitute with extra broth if needed |
| Salt 🧂 | 1 ½ tsp | Kosher salt for seasoning |
| Ground Black Pepper 🌶️ | ½ tsp | Freshly ground for best flavor |
| Fresh Thyme Leaves 🌿 | 1 tbsp | Or 1 tsp dried thyme |
The pork pieces are non-negotiable—look for bone-in chops or tenderloin from the butcher section (they’ll cut it for you). Costco or Whole Foods carry excellent quality, but any grocery store’s fresh pork works if it’s bright pink and firm to the touch. The butter matters too: European-style unsalted (like Plugrá) melts more smoothly than American brands. For the flour, King Arthur or Bob’s Red Mill are reliable choices—they won’t clump in the roux. If you’re short on time, pre-minced garlic from a jar works, but fresh is always better.
No white wine? Substitute with extra beef broth—just reduce the amount slightly to avoid thinning the sauce. Fresh thyme is ideal, but dried works at one-third the amount. The beef broth should be low-sodium—if yours isn’t, dilute it with water. For the roux, low and slow is key: cook the butter and flour on medium heat until it smells nutty but never browns. If your gravy turns out too thin, whisk in a cornstarch slurry (1 tbsp cornstarch + 1 tbsp cold water). For extra richness, stir in 1 tbsp of Worcestershire sauce at the end.
This gravy keeps beautifully—5 days in the fridge or 3 months in the freezer. Let it cool completely before storing in airtight containers. The flavor actually deepens overnight, so it’s perfect for meal prep. To reheat, warm on the stove over medium-low heat, stirring frequently. If it thickens too much, thin with a splash of broth. For serving, drizzle over roasted pork, mashed potatoes, or even pancakes—it’s that versatile.
Why You'll Love This Recipe
- One-Pan Magic: I swear by this recipe when I’m too tired to wash dishes. Sear the pork in the same pan, then deglaze with a splash of water—boom, gravy’s born. No extra pots, no stress.
- Rich Umami Bomb: That golden-brown crust on the pork? Pure flavor gold. The butter and flour create a velvety sauce, while the caramelized onions and garlic add depth. It’s like a hug in a bowl.
- Leftover Hero: Make a double batch—this gravy reheats like a dream. Drizzle it over breakfast hash, toss with roasted veggies, or slather it on toast. It’s my lazy Sunday go-to.
- Budget-Friendly Luxury: Pork tenderloin is affordable, and a little goes a long way. The butter and flour stretch to coat everything, so you’re not sacrificing taste for savings. Fancy dinner, zero guilt.
Step-by-step instructions for brown pork gravy
This method transforms simple ingredients into a velvety, deeply flavorful gravy perfect for weeknight meals.
Sear the Pork for Maximum Flavor
Pat the 1.5 lb pork chops or tenderloin completely dry with paper towels. Cut into even 1-inch pieces for consistent browning. Heat a large skillet over medium-high heat and add 2 tablespoons of the 0.5 cup unsalted butter, letting it melt until foaming.
Working in batches if needed, add the pork pieces in a single layer. Don't overcrowd the pan—this prevents proper browning. Sear for 3-4 minutes per side until golden brown and cooked through to an internal temperature of 145°F. Remove the pork and set aside, leaving the browned bits in the pan. These bits are the foundation of your gravy's rich flavor.
Build the Roux with Butter and Flour
Return the skillet to the heat and reduce to medium. Add the remaining 3 tablespoons of unsalted butter and let it melt completely. Sprinkle in the 0.5 cup all-purpose flour all at once, stirring constantly with a wooden spoon.
Cook the roux for 2-3 minutes, stirring vigorously, until it turns a rich nut-brown color. This should smell toasty and nutty—don't let it burn, or it will turn bitter. The roux is the thickening agent for your gravy, so proper development is crucial. If it darkens too quickly, reduce the heat slightly and continue stirring.
Sauté Aromatics for Depth of Flavor
Add the diced yellow onion to the roux and cook for 5 minutes until softened and translucent. Stir in the 4 minced garlic cloves and cook for another 30 seconds until fragrant. Here's where the flavors meld—don't rush this step or the garlic will burn and turn bitter.
Pour in the 0.5 cup dry white wine and scrape up all the browned bits from the bottom of the pan with your wooden spoon. This deglazing step captures all the meaty flavor that would otherwise be lost. Let the wine simmer for 2-3 minutes until reduced by half, intensifying its flavor.
Create the Gravy Base
Gradually whisk in the 2 cups beef broth, starting with about ½ cup at a time, allowing each addition to incorporate completely before adding more. This slow incorporation prevents lumps from forming in your gravy. Stir constantly over medium heat for 5-7 minutes until the mixture thickens slightly.
Season with 1.5 tsp salt and 0.5 tsp ground black pepper, then add the 1 tbsp fresh thyme leaves. Return the seared pork to the skillet and simmer together for 2-3 minutes to allow the pork to absorb the gravy's flavors. The gravy should coat the back of a spoon but still be pourable.
Adjust Consistency and Serve
Taste the gravy and adjust the seasoning if needed. For a thicker gravy, simmer uncovered for another 2-3 minutes to reduce further. If it's too thick, whisk in 1-2 tablespoons of hot beef broth to reach your desired consistency.
Serve the brown pork gravy immediately over mashed potatoes, egg noodles, or crusty bread. The gravy should be rich, velvety, and deeply flavorful with notes of caramelized pork, thyme, and wine. Each spoonful should deliver that satisfying mouthfeel and complex taste that makes weeknight dinners feel special.
Pro Tips For Making Brown Pork Gravy
- Deglaze Immediately: As soon as you pull the pork from the pan, pour in that pan juice—right now—while it’s still hot. I used to wait, and the gravy turned into a sad, thin sauce. The residual fat and caramelized bits in the pan are what make gravy rich, not the flour alone.
- Sweat Onions Low: Onions for gravy need to be soft and sweet, not browned. Cook them on medium-low with a pinch of salt until they’re translucent and just starting to break down—about 8-10 minutes. Browning them turns the gravy bitter, and no one wants that.
- Whisk Like a Madman: When you add the flour to the butter, whisk constantly for at least 2 minutes before adding liquid. This prevents lumps and gives you a smoother roux. I learned this after scraping three batches of gravy off my plate—lumpy gravy is a crime.
- Simmer, Don’t Boil: Let the gravy bubble gently for 5-7 minutes after adding stock. Boiling it turns it gluey and dull. A slow simmer thickens it properly while keeping it silky. Yes, it’ll take longer, but the difference is night and day.
Storing and reheating this dish
Fridge Storage Tips
Let your gravy cool completely before storing—this prevents condensation that can make it watery. Transfer to airtight glass containers (I love Ball mason jars) and refrigerate for up to 5 days.
The flavors actually deepen overnight, so it’s perfect for meal prep. Always leave ½ inch headspace to allow for expansion as it cools. 💫
Freezer Magic
For long-term storage, freeze gravy in silicone ice cube trays or freezer-safe bags—this makes portion control easy for later. Label each container with the date and use within 3 months for best quality.
When reheating, thaw overnight in the fridge before warming on the stove. Never microwave directly from frozen—it breaks the emulsion and makes the gravy grainy.
Stovetop Reheating
My preferred method is stovetop reheating—it preserves that silky texture. Warm gravy over medium-low heat, stirring frequently to prevent scorching. If it thickens too much, whisk in 1 tablespoon hot beef broth at a time until smooth.
For extra richness, add a pat of cold butter while reheating. This method takes about 5-7 minutes and keeps all the flavor intact. ✨
Microwave Shortcut
When you’re in a hurry, microwave reheating works in a pinch. Transfer gravy to a microwave-safe bowl, cover loosely with a damp paper towel, and heat in 30-second intervals, stirring between each.
Total time should be 1-2 minutes—any longer risks turning it rubbery. I only use this method for quick lunches, not for special occasions.
Thawing Tricks
For frozen gravy, the ice bath method works wonders. Place your sealed container in a bowl of cold water and let it thaw gradually in the fridge overnight. This preserves texture better than room-temperature thawing.
If you’re short on time, use the cold water immersion technique—just change the water every 20 minutes until fully thawed. Never use hot water, or you’ll risk bacterial growth.
Serving Suggestions
Reheated gravy tastes best when served over creamy mashed potatoes or buttery egg noodles. For a Southern twist, drizzle over biscuits or cornbread to soak up every last drop. I also love using it as a pancake topping—the pork and wine flavors add unexpected depth to breakfast.
Always taste and adjust seasoning before serving, as flavors can mellow slightly after reheating.
Nutrition facts
Frequently asked questions about brown pork gravy
Can I use pork shoulder instead of chops or tenderloin for this gravy?
Pork shoulder works beautifully—it's even more flavorful because of its fat content. Cut it into 1-inch cubes and brown them thoroughly. The extra fat will make your gravy richer, but you may need to skim off excess fat while it simmers. For 1.5 lb pork shoulder, follow the same searing and roux steps, but reduce the broth by ½ cup since pork shoulder releases more liquid.
What if I don’t have white wine? Can I substitute something else?
Yes, you can substitute apple cider vinegar (¼ cup) or extra beef broth (½ cup) for the wine. The acidity in vinegar mimics wine's brightness, while extra broth keeps the same savory depth. For a richer flavor, add 1 tsp soy sauce or Worcestershire sauce to compensate for the missing wine notes.
Why did my gravy turn out lumpy? How can I fix it?
Lumps usually happen when flour isn’t fully incorporated into the roux or when adding broth too quickly. To fix it, whisk in 1 tbsp cold water at a time while stirring vigorously over low heat. For future batches, whisk vigorously when adding broth, or make a cornstarch slurry (1 tbsp cornstarch + 2 tbsp cold water) to thicken instead of flour.
How can I make this gravy vegetarian?
Replace the pork with mushrooms or seitan (cut into similar pieces) and sear them until browned. Use vegetable broth instead of beef broth, and add 1 tbsp soy sauce or mushroom powder for umami depth. The roux and wine steps remain the same, but taste and adjust seasoning—vegetarian gravies often need more salt and acid.
Can I make this gravy ahead of time for a holiday meal?
This gravy actually tastes better the next day! Make it 1-2 days ahead and store it in the fridge. The flavors meld beautifully, and reheating preserves that silky texture. For holiday prep, freeze portions in ice cube trays—thaw overnight in the fridge before reheating. Just add a splash of broth if it thickens too much after reheating.