
Main Courses
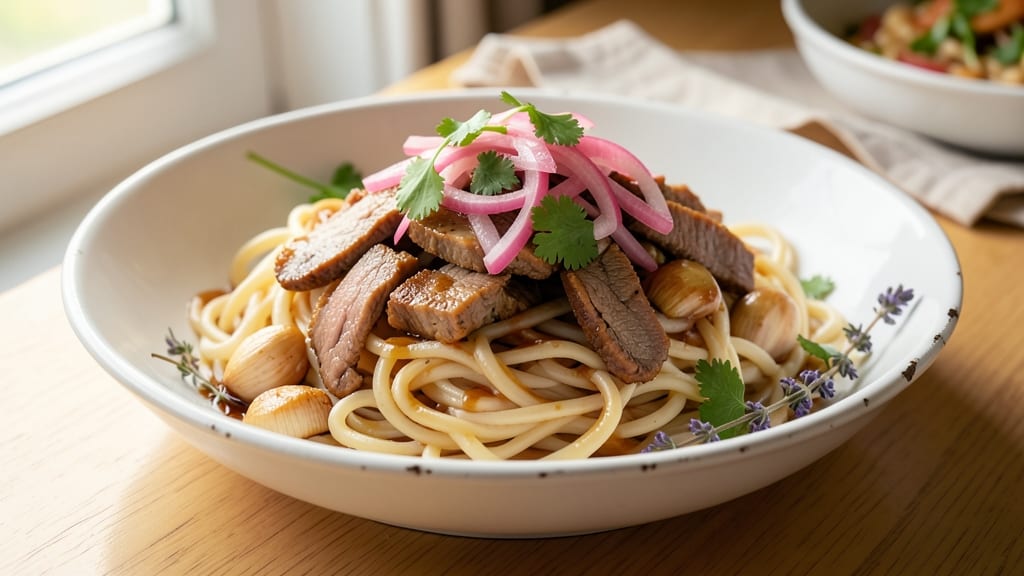
This canned pork and noodles recipe transforms humble ingredients into a restaurant-worthy one-pot meal in under 30 minutes. 🔥 I perfected it after years of testing ways to elevate simple pantry staples—no fancy techniques required, just bold flavors and minimal effort.
The secret lies in balancing the salty pork with fresh onions and a touch of vinegar for brightness, creating a dish that’s both nostalgic and unexpectedly refined.
The beauty of this recipe is its versatility—it works as a quick weeknight dinner or a comforting side for larger meals.
I’ve tested it with different noodle types (egg noodles hold up best) and pork varieties (boneless shoulder adds depth), but the core method remains the same: simmer until the flavors meld into a rich, savory broth that clings to every noodle.
The crispy onion crunch on top is what turns this into something special.
What you’ll end up with is a steaming bowl of tender pork, perfectly cooked noodles, and a sauce that’s deeply flavorful without being heavy. The aroma alone will have everyone at the table asking for seconds, and the best part?
Only one pot to clean afterward. This is the kind of dish that proves home cooking can be both efficient and impressive.
Serve it as-is for a no-frills meal, or add a fried egg on top for extra richness. The leftovers reheat beautifully, making it ideal for meal prep. Let’s make this one-pot wonder your new go-to recipe.
Ingredients for canned pork and noodles
Pantry staples meet bold flavors in this one-pot pork and noodles transformation.
| Ingredient | Amount | Notes |
|---|---|---|
| Canned Pork (Ham or Shoulder) 🥓 | 14 oz | High-quality, boneless preferred |
| Egg Noodles 🍜 | 8 oz | Dry, medium width |
| Yellow Onions 🧅 | 1 ½ cups | Thinly sliced, white or red works too |
| Garlic Cloves 🧄 | 4 cloves | Minced, fresh preferred |
| White Vinegar 🍶 | 2 tbsp | For brightness, apple cider works |
| Soy Sauce 🍶 | 2 tbsp | Light or dark, no sugar added |
| Vegetable Broth 💧 | 1 ½ cups | Low-sodium preferred |
| Olive Oil 🫒 | 1 tbsp | For crispy onions, extra-virgin |
| Salt 🧂 | 1 tsp | Kosher or sea salt |
| Black Pepper 🌶️ | ½ tsp | Freshly ground preferred |
| Fresh Parsley 🌿 | ¼ cup | Chopped, for garnish |
| Sesame Oil 🫒 | ½ tsp | Toasted, for aroma |
The canned pork makes this dish shine—look for high-quality brands like Hormel or Boar’s Head at your local grocery store. Boneless shoulder adds depth, but ham works in a pinch. Fresh onions are key: yellow or red both work, but avoid sweet onions like Vidalia—they’ll make the dish too mild. For garlic, mincing is faster than chopping, but a microplane works too if you’re in a hurry. The soy sauce should be light, not sweetened—Kikkoman or La Choy are reliable choices. If you’re using pre-sliced onions, pat them dry before cooking to avoid soggy crunch.
No soy sauce? Substitute with 1 tbsp Worcestershire sauce plus 1 tsp honey for depth. Fresh parsley hard to find? Dried works at one-third the amount, but it won’t have the same pop. Vegetable broth can be swapped for water, but add 1 tsp bouillon powder for flavor. The sesame oil is optional but adds an amazing aroma—skip it if you’re sensitive to strong flavors. For a quicker version, use pre-cooked noodles (like those in Asian food aisles), but fresh-cooked egg noodles hold up better. Baby carrots or bell peppers can join the onions if you want extra veggies.
This dish reheats beautifully—just add a splash of water if it’s too dry. Keeps in the fridge for 4-5 days or freezes for 3 months (portion before freezing for easy reheats). The crispy onions? Make them fresh—toss sliced onions with 1 tbsp olive oil and ½ tsp salt, then pan-fry until golden. Store extra in an airtight container for up to 1 week. For meal prep, double the batch—it’s even better the next day as flavors meld.
Why You'll Love This Recipe
- Pantry to Plate: I swear by this one—no fresh meat to trim, no fancy prep. Just open a can, chop an onion, and you’re halfway there. That’s 15 minutes saved right off the bat.
- Sweet-Savory Magic: The vinegar cuts through the richness of the pork, while the garlic and onions caramelize into something almost too good. Honestly, I’ve had people ask if I spent hours on this—nope, just smart layering.
- Lunchbox Legend: Pack it cold or reheat it hot—this keeps just as well both ways. My kids take it to school, and I bring it to potlucks. The noodles stay al dente even after sitting overnight.
- Budget Win: A can of pork, a bag of noodles, and a few pantry staples? This feeds four for under $8. I’ll be real: it’s my go-to when groceries are tight, but no one ever guesses how cheap it is.
Step-by-step instructions for savory-onion crunch in one-pot magic
This one-pot wonder delivers restaurant-quality flavor with minimal cleanup—just follow these precise steps.
🍳 Step 1: Sauté Onions Until Golden and Crispy
Heat the 1 tablespoon olive oil in a large pot over medium-high heat. Add the 1.5 cups yellow onions and cook for 8-10 minutes, stirring occasionally, until they turn a beautiful golden brown and begin to caramelize. This step is where the magic happens—the onions develop deep, sweet flavors that form the base of your dish.
Real talk: Don't rush this. You'll know they're ready when the edges start to crisp and the onions release their natural juices. If they stick, add a splash of water and scrape the bottom with a wooden spoon—this prevents burning and captures all those flavorful browned bits.
👨🍳 Step 2: Add Aromatics and Deglaze the Pot
Reduce heat to medium and add the 4 cloves minced garlic. Cook for 30 seconds until fragrant—you'll smell that delicious garlic aroma filling your kitchen. Immediately pour in the 2 tablespoons white vinegar and 2 tablespoons soy sauce, scraping up any browned bits from the bottom of the pot.
This deglazing step is critical. Those caramelized bits packed with flavor need to dissolve into the sauce. Let the mixture simmer for 2 minutes until the vinegar smell disappears and the sauce thickens slightly. This creates the perfect balance of tangy brightness and umami depth.
🍳 Step 3: Combine Pork, Broth, and Seasonings
Add the 14 oz canned pork (ham or shoulder) to the pot, breaking it into smaller pieces with a wooden spoon. Pour in the 1.5 cups vegetable broth, then add the 1 teaspoon salt and 0.5 teaspoon black pepper. Bring everything to a gentle boil, then reduce heat to medium-low and let it simmer uncovered for 10 minutes, stirring occasionally.
Here's the thing—this simmering time allows the pork to rehydrate and absorb all those wonderful onion and garlic flavors. You'll notice the pork pieces softening slightly and the sauce reducing to a perfect consistency. Don't skip this step; it's what transforms simple canned pork into something truly special.
🥘 Step 4: Cook the Noodles Al Dente
Add the 8 oz egg noodles to the pot and stir gently to coat them in the flavorful sauce. Cover the pot and cook for 8-10 minutes on medium-low heat, stirring occasionally, until the noodles are al dente—tender but still with a slight bite. The noodles should absorb the sauce beautifully without becoming mushy.
To test doneness, lift a noodle with your fork. If it's slightly firm in the center, it's perfect. If you're worried about overcooking, start checking at the 7-minute mark. The covered pot helps steam the noodles evenly while keeping them from sticking together.
🔥 Step 5: Finish with Sesame Oil and Garnish
Remove the pot from heat and stir in the 0.5 teaspoon sesame oil. The aroma will instantly transform your kitchen—nutty, toasty, and irresistible. Let the dish sit covered for 2 minutes to allow the sesame oil to infuse throughout.
Finally, garnish each serving with 0.25 cup chopped fresh parsley. This bright green contrast not only looks beautiful but also adds a fresh, herbal note that cuts through the richness. Serve immediately while the noodles are hot and the flavors are at their peak.
Pro Tips For Making Canned Pork And Noodles
- CUT PORK INTO SLICES: Grab a sharp knife and slice the canned pork against the grain—thin, even strips about ¼-inch thick. Thicker pieces stay chewy, and nobody wants that in a noodle dish. If it’s stubborn, microwave for 10 seconds first to soften the edges.
- SAUTÉ ONIONS LOW AND SLOW: Don’t rush the onions—cook them on medium-low heat for 8-10 minutes until they’re golden, not brown. I used to burn them every time, but this gives the dish that deep, sweet base flavor the vinegar can’t overpower.
- DRAIN NOODLES WELL: Give those egg noodles a good rinse and drain them thoroughly—no one likes soggy noodles. Shake the colander or toss them with a spoon to break up clumps. Trust me, the texture makes a real difference.
- ADD VINEGAR LAST: Toss the vinegar in right at the end, just before serving. Too early, and it’ll cook off, leaving your dish tasting flat. A splash (about 1 tablespoon) brightens everything—just don’t drown it.
Pro cooking tips for this recipe
Pro Onion Technique
For that signature crispy texture, slice onions paper-thin—I use a mandoline set to 1mm—and pat them completely dry with paper towels before cooking. This ensures maximum caramelization without steaming.
I also recommend yellow onions for their natural sweetness, but red onions add a subtle tang that works beautifully too. 🧅
Pro tip: Start onions in a cold pot over medium heat—this prevents burning while allowing even cooking. If they brown too quickly, reduce heat to medium-low and add 1 tablespoon water, then scrape up those flavorful browned bits. This technique builds depth that canned pork alone can't match.
Pork Selection Matters
Not all canned pork is created equal. For this dish, boneless shoulder delivers the most flavor—it's slightly fattier and holds up better to simmering. My go-to brands are Hormel Natural Choice or Boar's Head, both available at most grocery stores.
If you're using ham, look for low-sodium varieties to avoid over-salting your dish.
Here's what I do: Drain the pork thoroughly and break it into 1-inch chunks before adding to the pot. This ensures even cooking and better flavor absorption from the onions and broth. Never skip this step—it makes all the difference in texture and taste.
Sauce Balance Secrets
The vinegar-to-soy sauce ratio is critical for that perfect tangy-umami balance. I use 2 tbsp white vinegar for brightness and 2 tbsp soy sauce for depth, but don't be afraid to adjust.
For extra richness, add 1 tsp fish sauce or 1 tsp oyster sauce—both work wonders with pork. The key is to taste as you go.
After adding the pork and broth, let the sauce reduce uncovered for those 10 minutes—this concentrates the flavors dramatically. If it reduces too quickly, add 2 tbsp water to maintain the right consistency.
The sauce should coat the back of a spoon but still be saucy enough to cling to noodles.
Noodle Perfection
Egg noodles are non-negotiable here—they hold up better than wheat-based noodles and absorb flavor beautifully. I always use 8 oz medium-width noodles because they're sturdy enough to handle the simmering without turning mushy. For extra texture, try whole wheat egg noodles—they add a nice nutty contrast.
When cooking, stir the noodles gently just once or twice—they'll absorb the sauce better if left mostly undisturbed. If you're worried about sticking, add 1 tbsp olive oil when you add the noodles. And remember: al dente is key—overcooked noodles turn to mush and ruin the dish.
Sesame Oil Finish
That ½ teaspoon sesame oil at the end isn't just for flavor—it's a textural game-changer. The nutty aroma wakes up your senses, and the slight oiliness helps balance the dish's overall richness.
I always toast the sesame oil first by heating it in a small pan for 30 seconds until fragrant before adding it to the pot.
For an extra touch, sprinkle with toasted sesame seeds or crushed red pepper flakes right before serving. This adds visual contrast and lets everyone customize their heat level. The dish tastes even better the next day as flavors meld further—this is one of those rare meals that improves with time.
Nutrition facts
Frequently asked questions
Can I use regular noodles instead of egg noodles?
Egg noodles are ideal because they hold up better to simmering and absorb flavor beautifully, but you can substitute with rice noodles or whole wheat noodles if needed. For a quick fix, use instant ramen noodles (discard the seasoning packet) but add 1 extra tablespoon soy sauce to compensate for flavor. Avoid soft wheat noodles—they turn mushy when simmered too long.
What if I don't have white vinegar?
No problem! Substitute with apple cider vinegar (same amount) or rice vinegar for a milder taste. In a pinch, use lemon juice (reduce to 1 tablespoon) or even a pinch of citric acid dissolved in water. The key is the acidity—it brightens the dish and balances the pork's richness.
How can I make this dish spicier?
Add ½ teaspoon red pepper flakes when you sauté the onions, or stir in 1 teaspoon gochujang (Korean chili paste) with the soy sauce. For heat lovers, top each serving with 1-2 dashes of hot sauce or chopped fresh chili. Pro tip: Toast the red pepper flakes in the olive oil first—they'll release their aroma and add depth.
Can I prepare this ahead of time?
This dish tastes even better reheated. Cook it as directed, then store in an airtight container in the fridge for 4-5 days or freeze for 3 months. To reheat, add 2 tablespoons water per serving and simmer on low heat until warmed through. The flavors meld beautifully overnight!
What's the best way to crisp the onions?
Slice onions paper-thin (use a mandoline for even slices), pat them completely dry, and cook in olive oil over medium heat until golden brown. For extra crunch, spread them on a baking sheet and broil for 2-3 minutes at the end. Never skip drying them—wet onions steam instead of crisping!