
Main Courses
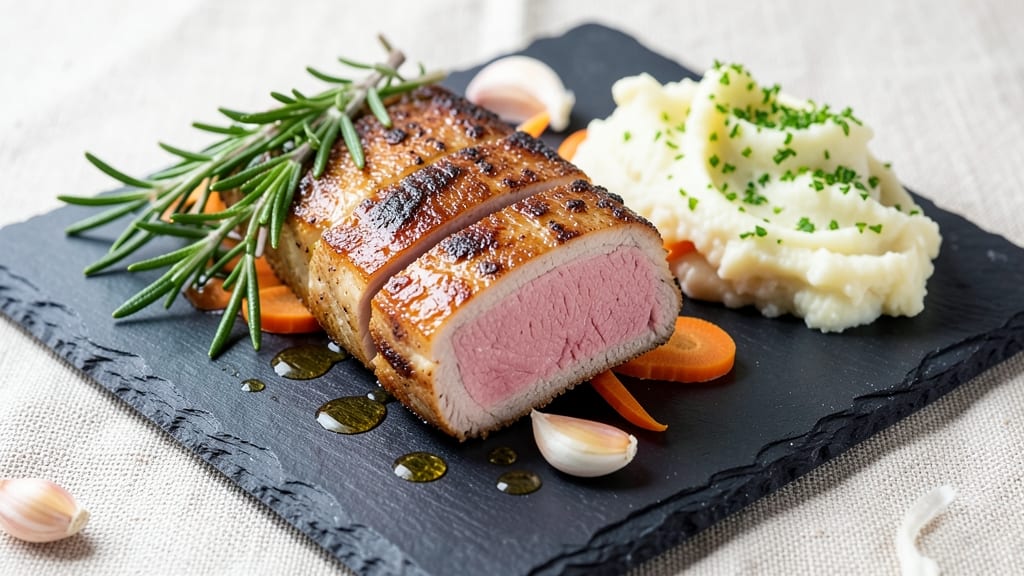
This clean eating pork tenderloin recipe delivers tender, restaurant-quality results in just 20 minutes—no heavy marinades or excess oil required. 💛 After years of perfecting pork techniques, I’ve developed a method that keeps the protein lean while maximizing flavor through fresh herbs, citrus, and a light crust.
The secret lies in high-heat searing followed by a quick rest, ensuring juicy meat every time without compromising clean eating principles.
What sets this recipe apart is its simplicity: a single tenderloin, fresh herbs, and a touch of lemon create a dish that’s both elegant and effortless. Unlike traditional pork preparations, this version avoids heavy breading or frying, focusing instead on natural seasonings and precise cooking techniques.
The result is a protein-rich meal that pairs beautifully with roasted vegetables or a light quinoa salad—ideal for health-conscious diners who still crave restaurant-quality flavor.
By the time you finish cooking, you’ll have perfectly seared pork with a tender interior and a fragrant herb crust, all achieved with minimal effort. The method preserves the natural lean protein while enhancing its flavor through citrus brightness and aromatic herbs.
This is the kind of dish that proves clean eating can be both nutritious and indulgent—without sacrificing taste or texture.
The best part? This recipe scales effortlessly for meal prep or entertaining, and leftovers reheat beautifully. Whether you’re meal planning for the week or hosting a dinner party, this pork tenderloin delivers restaurant-quality results with a fraction of the effort. Let’s get started!
Ingredients for clean eating pork tenderloin
Lean protein meets bold herb flavors in this clean eating pork tenderloin—just 12 ingredients for restaurant-quality results.
| Ingredient | Amount | Notes |
|---|---|---|
| Pork Tenderloin 🍖 | 1 ½ lb | Center-cut for even cooking |
| Extra-Virgin Olive Oil 🫒 | 2 tbsp | High-quality, fruity variety |
| Fresh Rosemary 🌿 | ¼ cup | Finely chopped, stems removed |
| Fresh Thyme 🌿 | ¼ cup | Leaves only, no stems |
| Fresh Parsley 🌿 | ¼ cup | Flat-leaf preferred |
| Garlic Cloves 🧄 | 4 cloves | Minced, not powdered |
| Lemon Zest 🍋 | 1 tbsp | From 1 organic lemon |
| Lemon Juice 🍋 | 2 tbsp | Freshly squeezed |
| Diamond Crystal Kosher Salt 🧂 | 1 ½ tsp | For seasoning |
| Freshly Ground Black Pepper 🌶️ | ½ tsp | Cracked peppercorns preferred |
| Avocado Oil 🫒 | 1 tbsp | For high-heat searing |
| Unsalted Butter 🧈 | 1 tbsp | Cold, cubed for basting |
The pork tenderloin should be center-cut and uniform—ask your butcher for the straightest cut possible. Whole Foods or local specialty markets often carry the highest-quality cuts, but any reputable grocery store will have suitable options. Look for bright pink color and minimal marbling—this ensures a lean, clean cut. Fresh herbs are non-negotiable here; Trader Joe's or local farmers markets offer the best quality. If using dried herbs, reduce to one-third the amount—they lack the vibrant flavor fresh herbs provide. The lemon should be organic whenever possible, as conventional lemons often have thicker skins that yield less zest.
No fresh rosemary? Substitute with 1/4 cup fresh thyme plus 1/4 cup fresh oregano, though the flavor will differ slightly. Running short on avocado oil? High-smoke-point grapeseed oil works equally well for searing. The butter can be omitted entirely if you're strictly avoiding dairy, though it adds richness and moisture—use Earth Balance vegan butter as a substitute. For extra lemon brightness, add an additional 1 tbsp lemon juice if your lemons are particularly tart. The kosher salt is critical; Diamond Crystal dissolves more easily than Morton's, so if you're using Morton's, reduce by one-quarter teaspoon.
Pork tenderloin stays fresh 3-4 days wrapped in paper towels in the fridge, but for best results, cook it within 24 hours of purchase. Fresh herbs should be stored in damp paper towels inside a sealed container to maintain crispness for up to 5 days. The zest and juice can be prepped ahead and stored in an airtight container for 3 days in the refrigerator. For meal prep, cook the pork, slice it, and store it in portioned containers—it reheats beautifully in a skillet with a splash of water or broth for 2-3 minutes to restore moisture. Freeze for up to 3 months if needed, though texture may be slightly altered.
Why You'll Love This Recipe
- One-Pan Magic: I swear by this for nights when I’m too tired to scrub pots—just sear the tenderloin in olive oil, toss in the rosemary and thyme sprigs, and let the oven do the work. The herbs infuse effortlessly while you’re chopping veggies or setting the table.
- Herb Bomb Flavor: That bright, piney aroma from fresh rosemary and thyme? It’s like a Mediterranean vacation in my mouth. The olive oil keeps it juicy, and the parsley at the end adds a fresh finish that makes it taste restaurant-worthy—not just dinner.
- Leftovers That Don’t Suck: Between us, pork tenderloin is one of the few proteins that actually improves the next day. Slice it thin, toss with a little more olive oil and parsley, and it’s perfect for grain bowls or wraps—zero sad desk lunches here.
- Budget Protein Powerhouse: A single tenderloin feeds four for under $15, and the herbs are cheap if you grow them (or even just buy a sprig). Honestly, it’s the kind of recipe where I feel like I’m treating myself, but my wallet doesn’t mind. Win-win.
Step-by-step instructions for herb-crusted pork tenderloin
This clean-eating method delivers perfectly tender, herb-infused pork in just 20 minutes—no shortcuts, just precision.
👨🍳 Step 1: Prep the Herb Crust and Season the Pork
In a small bowl, combine the 0.25 cup fresh rosemary, 0.25 cup fresh thyme, 0.25 cup fresh parsley, 4 cloves minced garlic, 1 tbsp lemon zest, 1.5 tsp kosher salt, and 0.5 tsp black pepper. Pulse briefly in a food processor until finely chopped but still textured—this ensures even distribution and maximum flavor infusion.
Pat the 1.5 lb pork tenderloin completely dry with paper towels. This step is non-negotiable for crispy crust and even cooking. Rub the herb mixture all over the pork, pressing firmly so the crust adheres. Let it sit at room temperature for 15 minutes—this allows the seasoning to penetrate and the meat to cook more evenly.
🔥 Step 2: Sear for Color and Crispy Texture
Heat a large skillet over medium-high heat until very hot. Add 1 tbsp avocado oil and swirl to coat. Place the pork tenderloin in the skillet and sear for 2 minutes per side until golden brown. Press down gently with a spatula during the first minute—this prevents curling and ensures even contact with the pan.
Remove the pork and set it aside on a plate. If the skillet isn't coated with browned herb bits, don't worry—we'll capture those flavors in the next step. The sear locks in juices while building that flavorful crust we're after.
🍳 Step 3: Finish with Lemon and Butter
Add 1 tbsp extra-virgin olive oil and 1 tbsp unsalted butter to the same skillet. Return the pork to the pan and pour in 2 tbsp lemon juice. Increase heat to medium-high and cook for 3-4 minutes, spooning the lemon butter mixture over the pork constantly. You're looking for an internal temperature of 145°F—use a meat thermometer to check in the thickest part.
The lemon brightens the herb flavors while the butter adds richness without heaviness. The pork should be golden and sizzling—this is your signal it's nearly done. If the crust starts to darken too quickly, reduce heat slightly to prevent overcooking.
⏰ Step 4: Rest and Slice for Maximum Tenderness
Transfer the pork to a cutting board and let it rest for 5 minutes. This resting period is crucial—it allows the juices to redistribute throughout the meat, preventing them from pooling and making each slice juicy and tender. During this time, tent loosely with aluminum foil to keep it warm.
Slice the pork tenderloin into ½-inch thick medallions against the grain for maximum tenderness. Serve immediately with the pan juices spooned over the top. Each slice should be perfectly pink in the center with a crispy herb crust that crumbles slightly at the touch.
Pro Tips For Making Clean Eating Pork Tenderloin
- SEAR FIRST, THEN ROAST: The pork needs that golden crust, but don’t overcrowd the pan—work in batches if needed. After a 2-minute sear on each side, transfer to a 400°F (200°C) oven for 15-20 minutes, or until internal temp hits 145°F. Rushing the sear means flavor gets stuck in the pan instead of on the meat.
- TRIM THE SILVER SKIN: That shiny membrane on the pork’s surface? Cut it off before seasoning—it’s tough and won’t render like fat. Use kitchen shears for speed, then pat the meat very dry with paper towels. Wet surfaces = steam = bland, soggy pork.
- SALT THE HERBS TOO: Fresh rosemary and thyme lose potency fast, but salting them first (toss sprigs in ½ tsp flaky salt) makes their flavor sing. Let them sit 10 minutes while you prep the pork—this draws out moisture, concentrating their aroma. (Yes, even if you’re impatient like me.)
- USE A MEAT THERMOMETER: Guessing doneness leads to dry pork or undercooked meat. Poke the thickest part—it should hit 145°F before resting. Pull it at 140°F if you’re nervous, then tent with foil for 5 minutes. The temp will climb to perfect while it rests. (Your future self will thank you.)
Pro cooking tips for perfect results
High-Heat Searing Secrets
Use a heavy-bottomed cast iron skillet like my Lodge 10.25-inch—it retains heat perfectly and prevents temperature fluctuations. Preheat it over medium-high heat for 3-4 minutes until it's screaming hot before adding oil.
I swear by avocado oil for its high smoke point (520°F), which ensures a crispy crust without burning those delicate herbs. 🔥
Never skip the 2-minute sear on each side—this builds the Maillard reaction that creates that restaurant-quality crust. Press down gently with a silicon spatula during the first minute to prevent curling. If your pork curls up, it won't brown evenly, and you'll lose that golden crust we're after.
Herb Crust Mastery
Fresh herbs make all the difference—Trader Joe's or your local farmers market are my go-tos for rosemary, thyme, and parsley. Pulse them briefly in a food processor (just 3-4 seconds) to break them down slightly while keeping texture.
This ensures even distribution and maximum surface area for flavor infusion. 🌿
Don't just sprinkle the herbs—press them firmly into the pork with your fingers. The crust should stick like glue to the meat. I like to make a crosshatch pattern with my fingertips for extra adhesion.
This technique guarantees every bite has that herbaceous punch without overwhelming the natural pork flavor.
Lemon Brightness Tip
Fresh lemon juice is non-negotiable here—bottled juice lacks the brightness and can taste flat. Use a Microplane to zest 1 organic lemon (the yellow part only) for that aromatic punch.
The zest adds layers of flavor that bottled juice simply can't match. Store-bought lemons often have thicker skins, so if yours is particularly tough, use 2 tbsp zest instead of 1.
When basting with lemon juice in the final step, don't be shy—pour it generously over the pork. The acidity cuts through the richness of the pork and butter while enhancing the herb flavors.
I like to tilt the pan slightly and spoon the lemon butter mixture directly onto the meat for even distribution.
Resting Like a Pro
This 5-minute rest is where many home cooks fail—never skip it. The pork continues cooking off the heat during this time, and the juices redistribute throughout the muscle fibers.
I cover it loosely with aluminum foil (not tightly) to keep it warm while allowing any excess steam to escape. 💡
Slice against the grain for maximum tenderness—½-inch thick medallions work perfectly. If you're serving this at a dinner party, arrange the slices on a platter and drizzle the pan juices over the top.
The crust should be crispy enough to crumble slightly, but not so hard it's chewy. Each bite should be juicy, flavorful, and perfectly cooked through.
Nutrition facts
Frequently asked questions
Can I substitute chicken breast for pork tenderloin in this recipe?
While chicken breast is lean like pork tenderloin, it requires different cooking times and techniques. Chicken breast cooks faster (165°F internal temp) and benefits from brining, which isn't needed here. For closest results, use the same herb crust but reduce cook time to 2-3 minutes per side and check doneness with a thermometer. Adjust lemon juice to 1 tbsp since chicken absorbs flavors differently.
How do I adjust this recipe for meal prep?
Cook the pork as directed, then slice into ½-inch medallions and store in an airtight container with parchment paper between layers. Reheat portions in a skillet with 1 tsp avocado oil over medium heat for 2-3 minutes—add a splash of water to restore moisture. The herb crust stays crispy when reheated this way. Portion into 4-ounce servings for balanced meals.
What's the best way to cook this pork if I don't have a skillet?
Use your oven instead! Preheat to 400°F and place the seasoned pork on a wire rack over a baking sheet. Roast for 12-15 minutes until internal temp reaches 145°F. Broil for 1-2 minutes at the end to crisp the herb crust. This method works equally well for clean eating and requires no oil.
Why does my pork turn out dry?
Overcooking is the #1 cause of dry pork. Always use a meat thermometer—145°F is perfect for tenderloin. The 5-minute rest is crucial too; skipping it lets juices escape. For extra moisture, baste with 1 tbsp lemon juice + 1 tbsp butter during the final 3 minutes of cooking. Never cut into the pork while it's hot—wait until it's cooled slightly.
Can I make this recipe dairy-free?
Simply omit the 1 tbsp butter and use 1 tbsp extra-virgin olive oil instead for basting. The herb crust remains intact, and the lemon juice provides enough acidity to balance flavors. For extra richness, add 1 tsp nutritional yeast to the herb mixture—it adds a cheesy note without dairy.